Connect Slaves Jenkins configured with JCasC - Docker
This is a continuation of the previous blog post for automating Jenkins server setup. The previous setup only created a setup for a single node Jenkins build server farm. This definitely won’t be sufficient for larger teams where they would be building applications and running workflows on a more frequent basis. Refer to the page: Automating Jenkins Initial Setup
The next step to try to automate would be the automating of adding worker or agent nodes to the entire cluster. Before going down that route, let’s first try to add it in a manual fashion that is extended from our previous step.
Let’s first aim to setup the agent on the same machine but have the main/controller and the other worker nodes to be separate docker containers.
Manually connect Jenkins agent to main Jenkins node
First, we’ll need to setup a new docker network - this is to allow the containers to talk to each other.
docker create network cicd
Next step would be create the Jenkins main node
docker build -t cjenkins .
docker run --name jenkins -p 8090:8080 --network cicd -d cjenkins
The Dockerfile and the way we would build it is all mentioned in previous post. This post is focusing on how we can connect the agent to the main/controller Jenkins server.
Once we have our Jenkins main controller running, the next step would be to be to set up the steps to manually connect our Jenkins agent. The first step is to click manage Jenkins

The next step would be to click the manage nodes
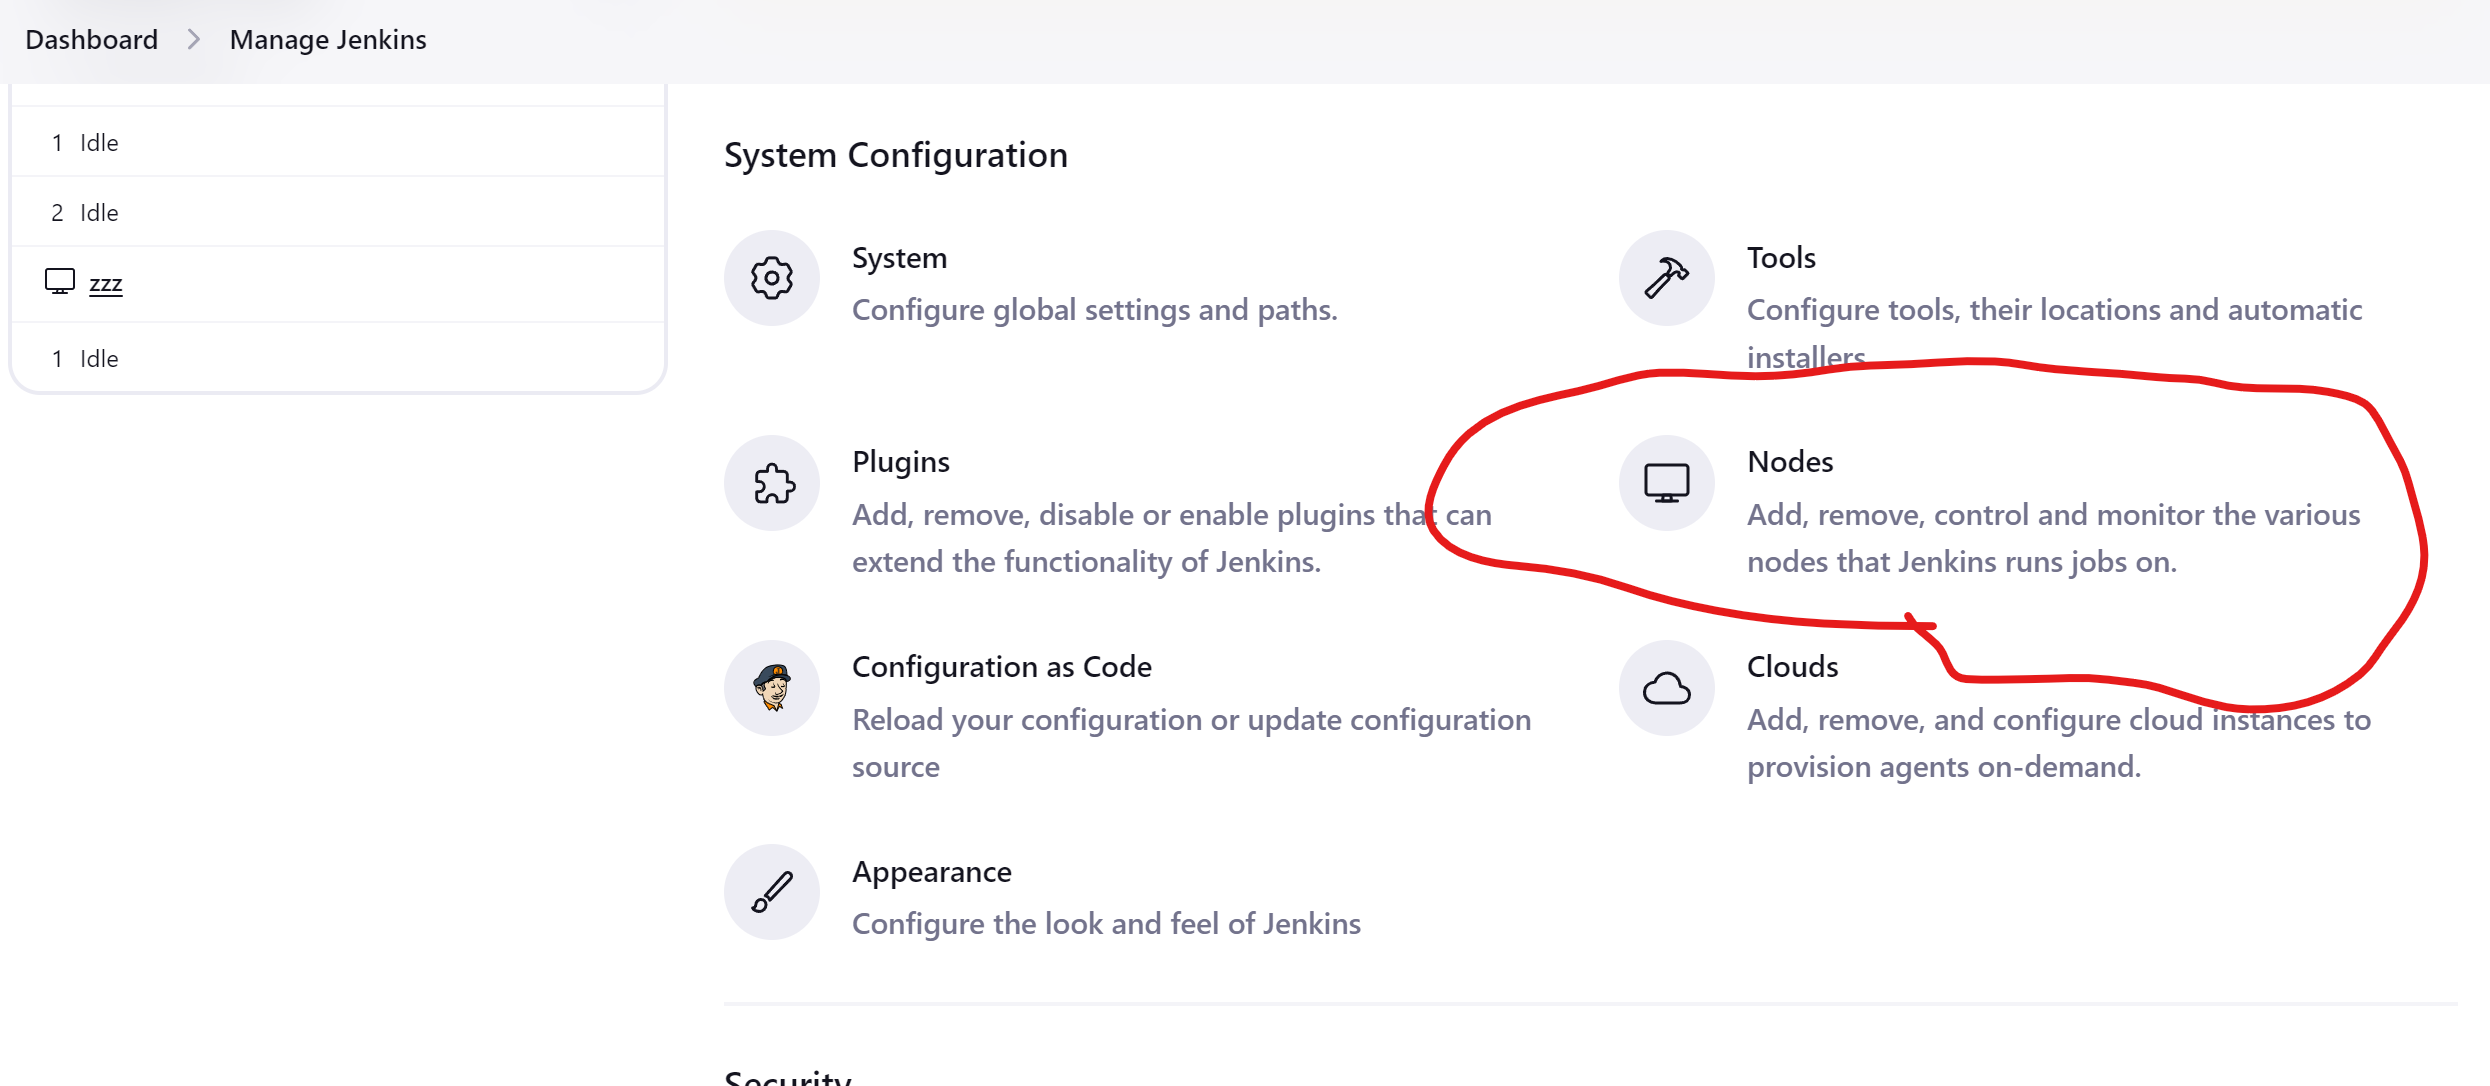
We can set then create a node that our main Jenkins main node will be managing.
- Name: zzz
- Number of executors: 1
- Remote root directory: /home/jenkins
- Labels: local
- Usage: Use this node as much as possible
- Launch Method: Launch agent by connecting it to the controller
- Availability: Keep this agent online as much as possible
Once we have configured it, we can then run the following docker Jenkins agent to have that connect to the Jenkins main node.
docker run --name agent -d --network cicd jenkins/agent java -jar /usr/share/jenkins/agent.jar -url http://jenkins:8080/ -secret <new secret always generated> -name zzz -workDir "/home/jenkins"
With that, the Jenkins node should be available for use. However, the above setup is only via manual means - we can definitely do better.
Docker-compose setup of Jenkins
TLDR - the setup will be maintained here: https://github.com/hairizuanbinnoorazman/Go_Programming/tree/master/Environment/jenkins. However, there is a chance that it might look different as compared to what we have on the blog, it will updated to keep up with thet times or maybe, there might be new features introduced to it.
This setup is a more “automated” setup of Jenkins main controller node as well as a worker node. This would probably be a “better” way to setup some Jenkins clusters since with such automation in place, we would need to specify almost everything that our Jenkins node need - e.g. secrets/keys that we would be using in order for the nodes would connect to each other.
The first part for this is to alter our controller Jenkins node’s dockerfile.
FROM jenkins/jenkins:latest
COPY plugins.txt /var/jenkins_home/plugins.txt
RUN /bin/jenkins-plugin-cli -f /var/jenkins_home/plugins.txt
COPY jenkins.yaml /var/jenkins_home/jenkins.yaml
ENV JAVA_OPTS "-Djenkins.install.runSetupWizard=false ${JAVA_OPTS:-}"
ENV CASC_JENKINS_CONFIG=/var/jenkins_home/jenkins.yaml
ENV SSH_PRIVATE_FILE_PATH=/home/jenkins/.ssh/ultimate_ssh_key
RUN git config --global user.email "you@example.com" && \
    git config --global user.name "Your Name"
COPY jobs /home/jobs
COPY pipelines /home/pipelines
USER root
RUN mkdir -p /home/jenkins/.ssh && chown jenkins:jenkins /home/jenkins/.ssh
USER jenkins
The first few lines are probably something that you’ve would have seen in previous blog posts on the jenkins topic. However, there are several new lines of code that might be of interest:
ENV SSH_PRIVATE_FILE_PATH=/home/jenkins/.ssh/ultimate_ssh_key
...
USER root
RUN mkdir -p /home/jenkins/.ssh && chown jenkins:jenkins /home/jenkins/.ssh
USER jenkins
These set of lines are partly to setup up the main Jenkins controller node to be able to utilize ssh keys in order to communicate with other Jenkins node. It’s definitely a pain to connect Jenkins node together in the manual fashion from the above portion of this blog post. SSH keys seem to be more saner (and possibly safer option here)
Important thing to note here is to create the .ssh directory at /home/jenkins and to ensure that we set the owner of that folder to jenkins. This is to ensure that our the user that’ll be in controll of our Docker container would be able to access ssh files.
RUN git config --global user.email "you@example.com" && \
    git config --global user.name "Your Name"
COPY jobs /home/jobs
COPY pipelines /home/pipelines
The lines mentioned here are mostly focused on us being able to set up pipeline jobs on the Jenkins and have it available immediately. One of the Jenkins job would require us to do some git operations to read pipeline Jenkinsfile code into Jenkins - that needs the git tool. However, the git tool is somewhat unusable unless we set the initial configuration such as setting global user.email and user.name.
The jobs mentioned here are mostly here to assist in creating in the Jenkins pipelines. Jenkins pipelines configurations are not immediately available on Jenkins Configuration as Code - however, the there is a Jobs DSL which we can use to define simple Jenkins job that would help us to define Jenkins pipeline jobs.
That’s for the our main Jenkins controller node Dockerfile
The next portion would be our Jenkin agent’s Dockerfile
FROM jenkins/agent
USER root
RUN mkdir -p /home/jenkins/.ssh && chown jenkins:jenkins /home/jenkins/.ssh
RUN apt update && apt install -y openssh-server
RUN ssh-keygen -A && service ssh --full-restart
CMD ["/usr/sbin/sshd", "-D"]
Due to sshd being a “root” level binary - we have no choice but to be root - probably need to figure how we can try avoid that, but that’ll be a problem for another day.
Also, similar to Jenkins controller’s Dockerfile, we would also create the .ssh folder and set the owner to Jenkins.
The final bit to get it all working together in a single command would be to write up docker-compose.yaml. With the above Dockerfiles, it should hopefully work with the following docker-compose.yaml definition.
version: '3.3'

services:
  jenkins:
    build:
      context: .
      dockerfile: Dockerfile
    ports:
      - 8090:8080
    restart: always
    volumes:
      - type: bind
        source: ./secrets/private
        target: /home/jenkins/.ssh/
        read_only: true
  agent:
    build:
      context: .
      dockerfile: agent.Dockerfile
    restart: always
    volumes:
      - type: bind
        source: ./secrets/public
        target: /home/jenkins/.ssh/
        read_only: true
In order to ensure that we’re not baking our ssh keys in the docker image, we need to ensure that it is mounted instead rather than adding it in a Dockerfile - during my first attempt at this, I added it within a Dockerfile but only realized quite a while later that that’ll be a very very bad move (in the case someone managed to get the access to the internal terminal app of the docker container.)
Do make sure that we have the folders available for use within the same folder that contains our main Jenkins controller’s Dockerfile (which is named Dockerfile) as well as our agent’s Dockerfile (which is named agent.Dockerfile). Our ssh keys should be in the /secrets folder with one public folder and one private folder. The public folder would only contain the authorized_keys file that would serve as the file that our main Jenkinsfile would authorize against with the private ssh key file. Our private folder would simply have the ultimate_ssh_key ssh key.
One more thing of note that is changed as compared to previous blog post would be our Jenkins configuration as code yaml file. Naturally, there will be a slight focus on how to connect our main Jenkins main controller node to other nodes.
jenkins:
  systemMessage: Jenkins managed via Configuration as Code
  securityRealm:
    local:
      allowsSignup: false
      users:
       - id: admin
         password: password
  authorizationStrategy:
    roleBased:
      roles:
        global:
          - name: "admin"
            description: "Jenkins administrators"
            permissions:
              - "Overall/Administer"
            entries:
              - user: "admin"
          - name: "readonly"
            description: "Read-only users"
            permissions:
              - "Overall/Read"
              - "Job/Read"
            entries:
              - user: "authenticated"
  crumbIssuer: "standard"
  numExecutors: 0
  nodes:
    - permanent:
        labelString: "linux"
        mode: NORMAL
        name: "zzz"
        numExecutors: 4
        remoteFS: "/home/jenkins"
        launcher:
          ssh:
            host: "agent"
            port: 22
            javaPath: "/opt/java/openjdk/bin/java"
            credentialsId: ultimate_ssh_key
            launchTimeoutSeconds: 60
            maxNumRetries: 3
            retryWaitTime: 30
            sshHostKeyVerificationStrategy:
              manuallyTrustedKeyVerificationStrategy:
                requireInitialManualTrust: false

credentials:
  system:
    domainCredentials:
      - credentials:
          - usernamePassword:
              scope: SYSTEM
              id: admin
              username: admin
              password: password
          - basicSSHUserPrivateKey:
              scope: SYSTEM
              id: ultimate_ssh_key
              username: jenkins
              description: "SSH private key file. Provided via file"
              privateKeySource:
                directEntry:
                  privateKey: "${readFile:${SSH_PRIVATE_FILE_PATH}}"
jobs:
  - file: /home/jobs/firstjob.groovy
  - file: /home/jobs/secondjob.groovy

unclassified:
  # scmGit:
  #   addGitTagAction: false
  #   allowSecondFetch: false
  #   createAccountBasedOnEmail: true
  #   disableGitToolChooser: false
  #   globalConfigEmail: jenkins@domain.local
  #   globalConfigName: jenkins
  #   hideCredentials: true
  #   showEntireCommitSummaryInChanges: true
  #   useExistingAccountWithSameEmail: false
  location:
    url: http://localhost:8090
    adminAddress: admin@jenkins.com
The new parts would be the credentials section where a new credential was added - a ssh key credential. For our permanent nodes, we would connect it via our ssh keys - this is done via ssh launcher configuration.
Another impact of the change in configuration is the need to install the following plugin as well. This plugin is to allow the Jenkins controller node to connect to agent nodes: ssh-slaves
Afterthoughts
So far, our setup is only done on a single machine. For future setups, I will probably look into expanding to multi node setups or even one where we have Jenkins that connect to a Kubernetes cluster - one where it can utilize the entire cluster as its build worker (assumption based on Kubernetes plugin seen in Jenkins list of plugins page)